


.jpg)
.jpg)
.jpg)
.jpg)
.jpg)
.jpg)
.jpg)
.jpg)
.jpg)
.jpg)
.jpg)
.jpg)
.jpg)
.jpg)
.jpg)
.jpg)


We recommend for all Members to play this Video Tutorial to gain insight and helpful tips about How to create a Canvas Print using pre-formatted images.
-
Where do I start to create a Canvas Print using pre-formatted images?
-
Why do I need to save my Canvas images as Landscape or Portrait format?
-
Landscape or Portrait - What do you mean by "allow for edge wrapping"?
-
Where can I find the Volume Discount pricing for each product?
Q: Where do I start to create a Canvas Print using pre-formatted images?
A: Within this website, go to Products, select Canvas Prints, and locate the Image Dimensions within the Product Specifications for each product.

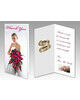
Website - Shows search for 20x40" Long Rectangle Canvas Print
Q: How do I use the Image Dimensions?
A: The Image Dimensions give you the Full Sheet sizes for either "Landscape" or "Portrait" format Canvas Prints. You can create pre-formatted original images in your specialist graphics program before uploading to the Online Software for insertion into your Canvas Print.

Website - Shows Image Dimensions for 20x40" Long Rectangle Canvas Print
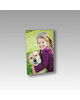
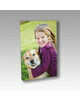
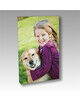
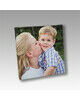
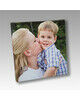
Q: Why do I need to save my Canvas images as Landscape or Portrait format?
A: Save your pre-formatted Canvas images as either Landscape or Portrait formats as the Online Software allows you to create Canvases in these formats for easier on-screen viewing.
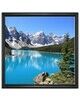
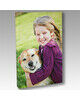
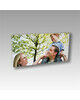
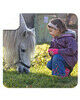
Q: Landscape or Portrait - What do you mean by "allow for edge wrapping"?
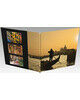
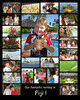
Lets use the above Landscape 20x40" Long Rectangle Canvas Print to explain.
The image will be printed on a Long Rectangular Canvas Sheet with image dimensions 108.20cm wide by 57.40cm high. Importantly for Canvas Prints, you must allow at least 3.3cm for edge wrapping on each edge. This means do not include any meaningful graphic elements like a person's face, or important text, within a 3.3cm imaginary edge-border on your Canvas image.

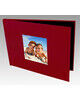
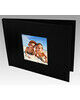
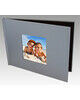
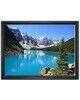
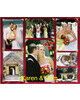
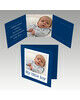
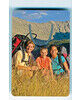
Online Software - Red Border shows Canvas Print edge wrapping
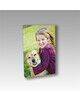
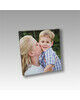
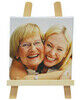
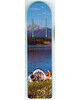
Q: What tips do you have to create the perfect Canvas Print?
A: An important tip we have for Canvas Print design is to create "Full Bleed" images that bleed to the Full Sheet Image Dimensions. This will give you the best edge-wrapping results every time.
Q: What image resolution should I use to get the best results?
A: When using a specialist graphics program, save your JPEG images at 300 DPI before uploading. If using camera images, upload only high-resolution images for best results.
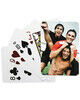
Q: What styles of Canvas Prints are available?
A: Within this website there are Product Specification pages for every available product. To find the styles of Canvas Prints available, complete a Product Search - go to Products and select Canvas Prints. Then browse the Select a Style menu to determine the style of Canvas Print that you wish to create.
Q: Where can I find the Volume Discount pricing for each product?
A: Within this website Members have access to the Volume Discount pricing structure that applies to every product in the range. The Volume Discount pricing information for each product can be viewed by opening the Product Specifications page for each product.
Q: What are the Minimum or Maximum order quantities?
A: There are no minimum or maximum order quantities. You can order any quantity of any product to suit your needs. The delivery charge for unlimited quantities of Canvas Prints within the same order is a flat fee of $9.95.
Q: How long does it take receive an order?
A: After your order submitted for production, allow 2 to 3 working days for production (subject to workload) then transit time to your address. Transit time will vary depending on Australia Post normal delivery times as quoted below:
| State | Working Days In Transit |
| QLD | City 2 days, Regional 2 days |
| NSW | City 2 days, Regional 2 days |
| VIC | City 3 days, Regional 4 days |
| SA | City 4 days, Regional 5 days |
| WA | City 5 days, Regional 6 days |
| NT | City 6 days, Regional 7 days |
| TAS | City 5 days, Regional 6 days |